This week’s challenge activity is to remediate an existing artefact:
- Choose an existing artefact that is the output of someone’s creativity. This could be a poem, short story, illustration, song or anything else you think is interesting.
- Modify the artefact in some way using the techniques you selected. The aim is to remediate it into another form of the artefact.
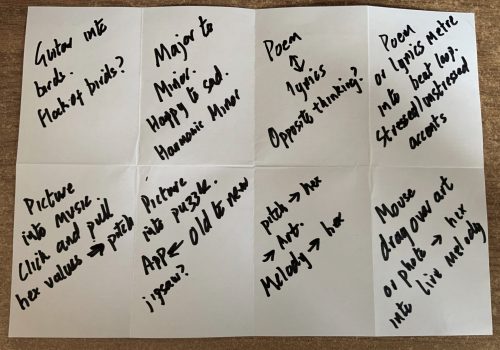
Crazy Eights

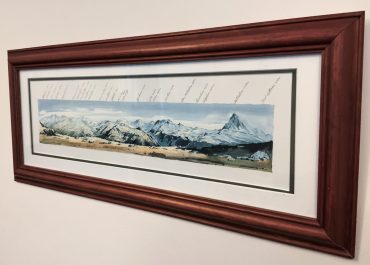
Selecting a Picture

Fig. 2: Unknown Maker (n.d).
Zermatt south and east. [watercolour]
Mind Mapping
Creating some kind of puzzle app would require further development of the ‘picture into puzzle’ concept. Learning how to use application prototyping software such as Figma or Adobe xd seemed like a sensible next step. I decided to mind map both the concept and the prototyping platform to learn. I chose to use Miro as it is a tool recommended in the learning resources which I had not previously used (see Figure 3).
After the mind mapping process I decided to use Adobe xd as the prototyping software due to having it installed already and being familiar with several of the Adobe suite of applications. The prototyped app will allow the user to rearrange a muddled up version of the image back into the original image. I decided to split the image into rectangles and then research how to switch them within Adobe xd.
Manipulating the Image
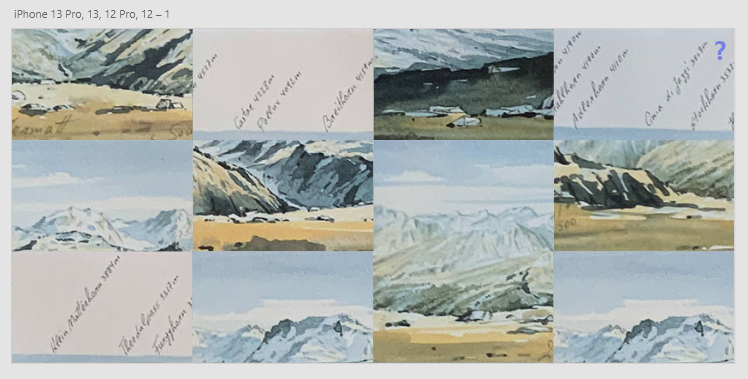
I took a photo of the painting and then opened Adobe xd. I selected a template for iPhone 12 and found its dimensions were 844 x 390 pixels. Using this as a basis I opened Photoshop and cropped the photo to 844 x 390 pixels and used the spilt tool to divide the image into 21 sections (see Figure 4) . This ensured that a part of the image (3 by 4) would fit exactly on the iPhone artboard within Adobe xd.

Then next stage was trying to figure out how the images would be switched to another within each tile on the artboard in Adobe xd. Xdguru (n.d) explains how to create vertical and horizontal scroll groups, however, when I experimented with these I discovered they were not latching and would not snap into position. I decided against this approach as it would be very difficult to recreate the original image as every image would need to be precisely positioned. Sliders can be created by duplicating artboards (Rae 2020), however, this process is suited to a small number of possible states as each different state requires a duplicated artboard. This approach would be impracticable due to having twelve tiles on the artboard with each tile having a possible 21 states.
An alternative approach outlined by Rae (2020) is to have to images switch when tapped by using slider component states. This approach uses just one artboard so I tested this with a single collection of 21 possible states in one component. As the states cycled through in a predictable order I created a new pseudo-randomised sequence of 21 states by selecting the next tile in the sequence at random. After a successful test where I was able to interact with a preview and select all 21 states I proceeded to copy the working component to all 12 positions (see Figure 5). I selected a different initial state for each tile and was able to successfully change any tile to the next one in the sequence to rebuild the original image.
To offer assistance to a potential user I added a help icon which brings up the original image with left / right interaction arrows. These arrows allow the user to select from one of four potential images to recreate. I was able to add this simple feature as the original image was cut into 7 by 3 sections, however, the design that was implemented will only ever show 4 by 3. Although this was a successful addition to the prototype I think that it would be a more interesting to be able to select and interact with an entirely new image or photograph.

Preview of Prototype
Fig. 6: Matterhorn Video Demo – Adobe xd
Fig. 7: Matterhorn Live Demo – Adobe xd
List of Figures
Figure 3: Mind Map of Puzzle App. June, 2022. Screenshot by the author.
Figure 7: Matterhorn Live Demo – Adobe xd. June, 2022. App demo hosted by Adobe.
Reference List
XDGURU.COM. 2022. ‘Adobe XD Scroll Groups – Vertical and Horizontal Scroll in XD – XDGuru’. Xdguru [online]. Available at: https://www.xdguru.com/adobe-xd-guide/scroll-groups/ [accessed 12 Jun 2022].
